
A household dehumidifier helps control indoor humidity, reduce excess moisture, and maintain a comfortable living environment. However, dust, dirt, and accumulated water can gradually affect its performance. Regular cleaning is essential to keep the appliance operating efficiently and reliably.
Proper dehumidifier maintenance involves cleaning the water tank, air filter, ventilation openings, drainage system, and accessible internal components. Following a consistent cleaning schedule can help prevent unpleasant odors, maintain airflow, reduce unnecessary energy consumption, and extend the appliance’s service life.
How to Clean a Household Dehumidifier: Step-by-Step Guide
Cleaning a household dehumidifier involves several important steps, from preparing the appliance safely to removing accumulated dirt and inspecting essential components.
Although cleaning procedures vary depending on the dehumidifier’s design, the following steps apply to many common household models. Always check the manufacturer’s instructions before cleaning removable or internal components.
Step 1: Isolate the Appliance from Its Power Supply
Begin with the controls switched off, then remove the plug from its socket before touching any part you intend to clean. With mains power disconnected, the machine cannot start unexpectedly during cleaning, and electrical shock exposure is reduced.
After a long operating session, wait until hot components have cooled before approaching any user-accessible internal area. Never attempt to clean electrical parts while the unit remains connected to power.
Prepare the following cleaning supplies:
- Soft microfiber cloth: For wiping exterior surfaces and accessible components.
- Mild dish detergent: For cleaning removable parts when permitted by the manufacturer.
- Warm water: For washing the water tank and compatible components.
- Soft-bristled brush: For removing dust from ventilation openings.
- Vacuum cleaner: For removing loose dust from accessible air intake areas.
- Dry towel: For removing remaining moisture after cleaning.
Avoid using abrasive brushes, strong chemical cleaners, or excessive amounts of water. These can damage plastic components, protective coatings, or sensitive electrical parts.
Place the dehumidifier on a stable, level surface with enough space to access the water tank, air filter, and ventilation openings comfortably.
Step 2: Clean the Water Tank
The water tank is one of the most important components to clean because it collects moisture removed from indoor air.
When water remains in the reservoir for extended periods, dirt and microorganisms may accumulate, potentially causing unpleasant odors or visible deposits.
Follow these steps to clean the water tank properly:
- Carefully remove the water tank from the dehumidifier.
- Empty any remaining water into a suitable drain.
- Rinse the tank with clean, warm water.
- Work a little mild detergent over the reachable tank surfaces with a gentle cleaning motion.
- Look inside the corners and along joins for residue that a quick rinse may leave behind.
- Rinse thoroughly to remove detergent residue.
- Allow the tank to dry before reinstalling it.
For stubborn mineral deposits, use only a cleaning solution approved in the appliance’s instructions. Avoid combining different cleaning chemicals, as some mixtures can release hazardous fumes.
Check the tank’s float mechanism if one is installed. Make sure it moves freely and is not obstructed by dirt or mineral buildup.
The tank should also be inspected for cracks, damaged seals, or other visible defects that could cause water leakage during operation.
Maintenance Tip: Empty the water tank whenever it becomes full. Even when the reservoir is not completely filled, avoid leaving collected water standing for long periods.
Step 3: Clean the Air Filter
The air filter helps capture airborne dust, lint, and other particles before air passes through the dehumidifier.
Over time, accumulated dust can restrict airflow, reducing moisture removal performance and placing additional strain on the appliance’s fan and other components.
Use this sequence for filter care:
- Find the filter compartment; on many models, it sits immediately behind the incoming-air grille.
- Follow the removal sequence shown for your model, easing the filter out without forcing its supports.
- Lift loose particles from the filter with gentle vacuum suction or light strokes of a soft brush.
- If the filter is washable, rinse it with water as instructed.
- Keep the washed filter out of the machine until no moisture remains in its frame or material.
- Replace the filter if it is damaged or no longer suitable for use.
Not all dehumidifier filters are washable. A disposable element or specialist filter medium may need a fresh replacement when dirty; washing is not suitable for every design.
Treat dryness as a condition for refitting the filter, except where the model instructions explicitly state otherwise. Excess moisture can encourage microbial growth and may affect nearby electrical components.
A clean filter allows air to circulate more freely through the appliance, helping maintain consistent dehumidification performance.
Maintenance Tip: Inspect the air filter every two to four weeks during regular operation. Shorten the inspection interval if pet hair or household dust builds up quickly, or the machine runs for much of the day.
Step 4: Clean the Air Intake and Outlet Vents
The air intake and outlet vents allow air to circulate through the dehumidifier. These openings are essential for effective moisture removal and proper heat exchange.
Dust, lint, and pet hair can accumulate around ventilation grilles, gradually restricting airflow and reducing operating efficiency.
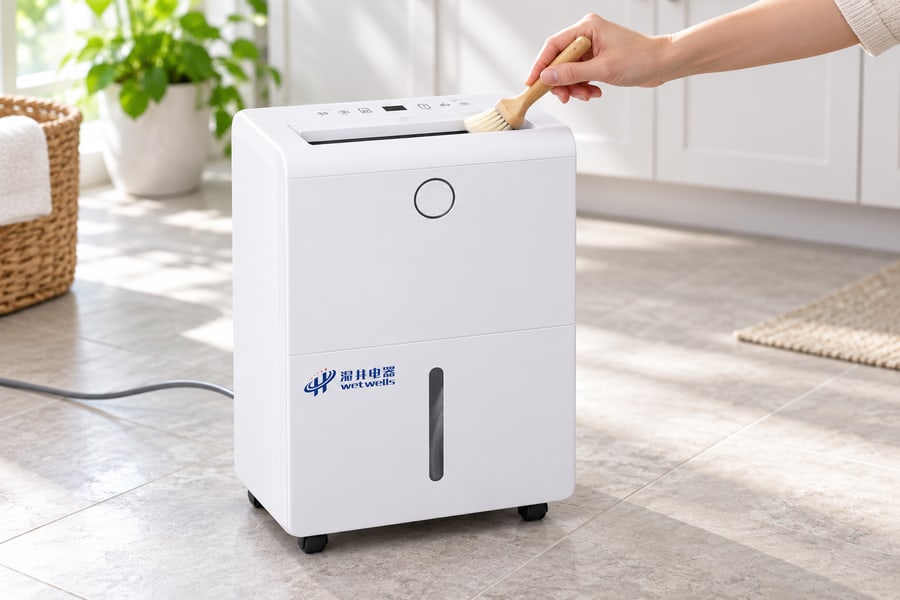
Sweep the reachable grille edges lightly with soft bristles, or lift surface dust away using a vacuum attachment. Pay particular attention to narrow spaces where debris can accumulate.
When cleaning ventilation openings:
- Turn off and unplug the appliance.
- Remove visible dust using gentle brushing or vacuuming.
- Avoid pushing dirt deeper into the unit.
- Do not insert sharp objects through ventilation openings.
- Keep liquids away from internal electrical components.
If the ventilation grille can be removed safely, follow the manufacturer’s instructions for cleaning and reinstallation.
After cleaning, make sure the air intake and outlet remain unobstructed. Avoid placing the appliance directly against walls, curtains, furniture, or other objects that could restrict airflow.
Adequate clearance around the dehumidifier helps improve air circulation and allows the appliance to operate under its intended conditions.
Step 5: Inspect and Clean the Coils
Refrigerant household dehumidifiers use evaporator and condenser coils to remove moisture from the air. Dust accumulation on these components can interfere with airflow and heat transfer.
Dirty coils may reduce moisture removal efficiency and contribute to longer operating periods. However, their accessibility varies significantly between different dehumidifier designs.
If the coils are accessible and the manufacturer permits user cleaning, carefully inspect their surfaces for accumulated dirt, lint, or dust.
Use a soft brush or another approved cleaning method to remove loose deposits without damaging delicate metal fins.
Important precautions include:
- Avoid excessive pressure: Thin coil fins can bend easily.
- Do not use sharp tools: These may damage coil surfaces or refrigerant tubing.
- Avoid excessive moisture: Water entering electrical components can create safety hazards.
- Do not open sealed systems: Refrigeration components require qualified service personnel.
Many household dehumidifiers have internal coils that are not intended for user access. For these designs, limit routine homeowner care to the filters and ventilation openings identified as serviceable in the manual.
Some dehumidifiers use desiccant technology rather than refrigeration coils, so their internal maintenance requirements may differ.
If heavy dust accumulation is visible inside the appliance or cooling-related performance problems persist, professional inspection may be necessary.
Step 6: Clean the Drainage System
Many household dehumidifiers support continuous drainage through a hose, allowing collected water to flow directly into a floor drain or another suitable outlet.
This arrangement reduces the need for frequent manual emptying, but the drainage system still requires regular inspection and cleaning.
Over time, sediment, dirt, and microbial buildup can accumulate inside the hose, potentially restricting water flow or causing unpleasant odors.
Work through these drainage-care checks:
- Start with the unit switched off and its mains plug removed from the socket.
- Use the release method specified for your drain connection to detach the hose without stressing the fitting.
- Inspect the hose for bends, kinks, or visible deposits.
- Flush compatible removable tubing with clean water.
- Remove accessible debris without damaging the hose.
- Refit the tubing firmly, then watch the joint for escaping water when drainage resumes.
For gravity drainage systems, make sure the hose follows the required downward slope without unnecessary loops or elevated sections.
If the dehumidifier uses a built-in drainage pump, follow its specific maintenance instructions. Pump components may require different cleaning procedures from standard gravity drainage systems.
Inspect hose connections and seals regularly to ensure collected water flows correctly without leaking onto surrounding surfaces.
Maintenance Tip: Check the drainage hose every one to three months, or more frequently when the dehumidifier operates continuously in humid conditions.
Step 7: Clean the Exterior
The exterior housing protects the dehumidifier’s internal components from dust, accidental contact, and environmental exposure.
Although exterior cleaning does not directly remove moisture from indoor air, keeping the housing clean helps prevent dust from accumulating near air openings and controls.
Use a soft, slightly damp microfiber cloth to wipe the appliance’s exterior surfaces. Remove fingerprints, dust, and other visible contamination.
For areas with stubborn dirt, apply a small amount of mild detergent to the cloth rather than spraying liquid directly onto the appliance.
Pay particular attention to:
- Control panel: Remove dust without allowing moisture to enter buttons or display openings.
- Handles: Clean areas frequently touched during transportation.
- Cabinet corners: Remove accumulated dust and dirt.
- Power cord: Inspect for visible damage while cleaning nearby surfaces.
- Base and feet: Remove debris that could affect the appliance’s stability.
Finish the cabinet with a fresh dry cloth, taking up any dampness left by the cleaning pass.
Once all cleaned components are completely dry and correctly reinstalled, reconnect the appliance and check that it operates normally.
Confirm that the water tank is properly seated, airflow is unobstructed, and no drainage connections are leaking.
Setting a Practical Dehumidifier Cleaning Schedule
The ideal cleaning frequency depends on operating hours, indoor air quality, humidity levels, and the surrounding environment.
A dehumidifier running continuously in a humid basement may require more frequent maintenance than one used occasionally in a bedroom or living room.
The following schedule provides general guidance for maintaining a typical household dehumidifier.
| Component | Recommended Cleaning Frequency | Maintenance Task |
| Water Tank | Every few days or when emptied | Empty, rinse, and inspect for deposits |
| Air Filter | Every 2–4 weeks | Remove dust and wash if permitted |
| Air Intake and Outlet Vents | Monthly | Remove accumulated dust and debris |
| Exterior Housing | Monthly | Wipe surfaces and inspect the power cord |
| Drainage Hose | Every 1–3 months | Check for blockages, leaks, and improper positioning |
| Accessible Coils | Periodically, as instructed | Inspect and clean only when permitted |
| Complete Unit | Before seasonal storage | Clean, inspect, and dry accessible components |
These intervals are general recommendations rather than universal requirements. Always prioritize the cleaning schedule provided in the appliance’s user manual.
Factors That Affect Cleaning Frequency
Several environmental and operating conditions can influence how quickly a dehumidifier becomes dirty.
- Continuous operation: Longer operating hours increase airflow through the filter and ventilation system, potentially accelerating dust accumulation.
- Dusty environments: Homes with construction dust, carpets, or significant airborne particles may require more frequent filter maintenance.
- Pets: Animal hair and dander can accumulate around air intake openings and filters.
- High humidity: Frequent moisture collection increases the importance of water tank hygiene and drainage maintenance.
- Seasonal operation: Appliances used primarily during humid months should be inspected before and after their operating season.
Instead of relying entirely on fixed cleaning intervals, regularly inspect the appliance for visible dirt, unusual odors, reduced airflow, or drainage problems.
A simple maintenance checklist can help homeowners track cleaning tasks and identify problems before they affect normal operation.
Common Dehumidifier Problems Caused by Poor Maintenance
Insufficient cleaning and maintenance can contribute to several common operating problems, including reduced moisture removal, unpleasant odors, drainage difficulties, and unusual sounds.
A change in performance can have causes beyond dirt or missed cleaning. Room temperature, humidity settings, and mechanical faults can also affect operation.
Reduced Dehumidification Efficiency
A common sign of maintenance-related problems is a noticeable reduction in the amount of water collected during normal operation.
Clogged filters and blocked ventilation openings restrict airflow through the appliance, potentially reducing its ability to remove moisture efficiently.
Dust accumulation on heat exchange surfaces can also affect refrigerant dehumidifier performance by reducing heat transfer efficiency.
To address possible maintenance-related causes:
- Inspect and clean the air filter.
- Clear any dusty deposits around both the incoming-air and discharge grilles.
- Check that furniture and walls are not obstructing airflow.
- Verify that the humidity setting is appropriate.
- Inspect accessible coils only when permitted.
Remember that lower room humidity or cooler operating conditions can naturally reduce water collection. A decrease in collected water does not automatically indicate a dirty appliance.
If cleaning does not restore expected operation, further inspection may be required to identify mechanical or electrical problems.
Unpleasant Odors
Unpleasant odors may develop when collected water, dirt, or other contaminants remain inside the dehumidifier for extended periods.
The water tank is a common source of odors, particularly when moisture remains standing in a warm environment.
Dust buildup inside accessible areas and contamination in drainage hoses may also contribute to unwanted smells.
To reduce odor recurrence, avoid leaving collected water in the reservoir, keep washable removable parts clean, and maintain a clear route for drainage.
If visible mold appears on accessible removable components, clean them using methods approved by the manufacturer and dry them thoroughly.
Persistent odors that remain after routine cleaning may indicate contamination in areas requiring professional servicing.
Cleaning a dehumidifier does not replace the need to address water leaks, damp materials, or other underlying moisture problems within the home.
Water Leaks and Drainage Problems
Water leakage can occur when the water tank is incorrectly installed, a drainage hose becomes blocked, or a connection is loose.
Improper appliance positioning can also interfere with water collection and drainage, especially when the unit is placed on an uneven surface.
When investigating a leak, first disconnect the appliance from its power supply.
Inspect the following components:
- Water tank: Ensure it is seated correctly and free from cracks.
- Drainage hose: Check for blockages, bends, or loose connections.
- Drain outlet: Confirm that water can flow freely.
- Drainage pump: Inspect according to the manufacturer’s instructions, if equipped.
- Appliance position: Make sure the dehumidifier stands upright on a level surface.
After correcting any visible problems, test the drainage system under normal operating conditions and monitor for further leakage.
If water continues leaking from an unidentified internal location, stop using the appliance and arrange appropriate servicing.
Unusual Operating Noise
Household dehumidifiers normally produce sound from fans, compressors, and moving air. However, new rattling, scraping, or excessive vibration may indicate a problem.
Dust accumulation around ventilation openings can contribute to airflow restriction and unusual sound changes.
An unstable surface, loose external panels, or objects touching the cabinet may also produce vibration during operation.
Start by checking the appliance’s position and removing any objects that could interfere with the housing or airflow.
Clean the external ventilation openings and confirm that removable parts, including the filter and water tank, are correctly installed.
If unusual noise continues, particularly grinding or metallic scraping sounds, professional inspection may be necessary.
Avoid disassembling internal fan motors, compressor assemblies, or electrical systems without the appropriate technical qualifications.
How to Store a Household Dehumidifier Properly
Proper storage helps protect a household dehumidifier from dust, moisture buildup, and potential damage during extended periods of inactivity. Before storing the appliance, clean all accessible components and ensure they are completely dry.
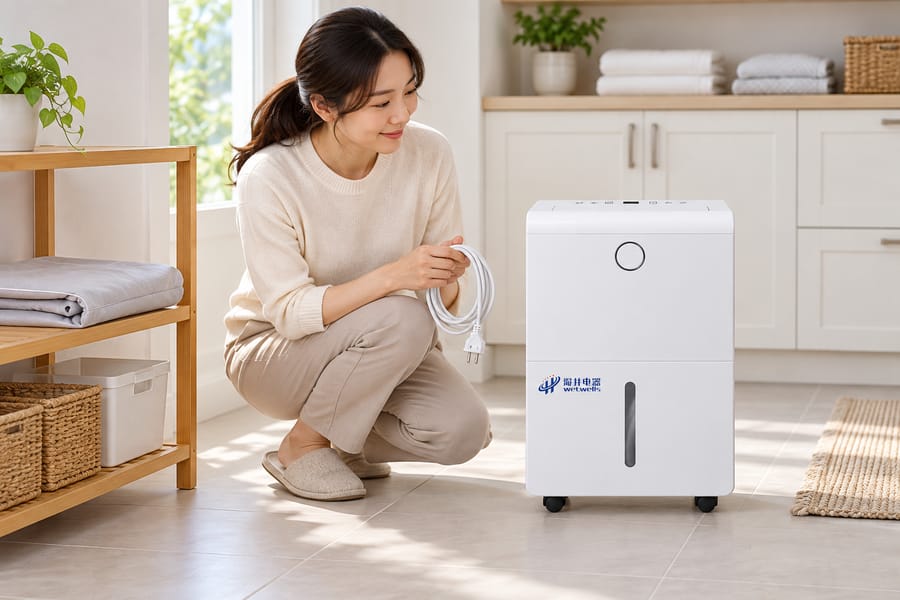
Follow these essential storage steps:
- Empty and clean the water tank: Remove collected water, wash the reservoir, and allow it to dry thoroughly.
- Clean the air filter: Remove accumulated dust and ensure washable filters are completely dry.
- Inspect the drainage system: Disconnect the drainage hose, remove remaining water, and check for blockages or damage.
- Dry the appliance: Follow the manufacturer’s recommended shutdown or internal drying procedure to reduce residual moisture.
- Upright storage: Keep the appliance standing in a dry, sheltered spot where dust, direct sun, and temperature extremes will not affect it.
- Protect the appliance: Cover the completely dry unit with a suitable dust cover and store the power cord without sharp bends.
Before using the dehumidifier again, inspect the water tank, air filter, drainage connections, and ventilation openings. Before startup, verify that each removable part is back in its intended position and that nearby objects leave the air paths clear.
After a move that involved tilting the cabinet, consult the model guidance for any required upright settling period before switching it on. Once operating, check for normal airflow, proper water collection, unusual noises, and leaks.
Regular cleaning and proper seasonal storage help maintain reliable dehumidifier performance and keep the appliance ready for future humidity control needs.