
Water damage restoration goes beyond extracting visible water. Moisture can remain inside drywall, flooring, insulation, framing, subfloors, and other materials after the surface appears dry.
Dehumidifiers remove the water vapor released during structural drying. The correct number of units depends on affected volume, evaporation load, temperature, equipment capacity, and actual site conditions—not floor area alone.
Why Proper Dehumidifier Sizing Is Important in Water Damage Restoration
Air movers encourage moisture to evaporate from wet materials, while dehumidifiers remove that water vapor from the air. Both processes must remain reasonably balanced.
If dehumidification capacity is too low, RH can stay high even while wet materials continue releasing moisture. This slows drying and may extend the overall restoration period.
Using too few dehumidifiers can lead to:
- Slow structural drying
- Persistently high relative humidity
- Increased drying time
- Higher equipment rental and labor costs
- Greater risk of secondary moisture problems
- Excessive compressor runtime
- Poor coordination with air movers
Using too many units is not automatically better. Excess equipment increases electrical demand, rental costs, transportation requirements, and site congestion without always reducing drying time proportionally.
The goal is to provide enough moisture-removal capacity to maintain favorable drying conditions while wet materials progressively release stored moisture.
What Information Do You Need Before Calculating?
Before calculating the number of dehumidifiers, first define the affected drying area and collect basic information about temperature, moisture conditions, and wet materials.
Room Dimensions
Measure:
- Length
- Width
- Ceiling height
- Number of connected rooms
- Open or contained areas
Calculate room volume using:
Room Volume = Length × Width × Height
For example:
30 ft × 20 ft × 8 ft = 4,800 ft³
Volume is more useful than floor area alone. A 600 ft² room with an 8-ft ceiling contains much less air than the same room with a 14-ft ceiling.
Also record:
- Indoor temperature
- Initial RH
- Material moisture readings
- Type of water-damaged materials
- Amount of wet material
- HVAC operation
- Outdoor conditions
- Air leakage
- Door-opening frequency
Two rooms of the same size can require very different drying capacity. A small localized leak creates a much lower moisture load than saturated carpet, drywall, insulation, and framing throughout the same space.
Determine the Water Damage Class
Water damage class helps describe the expected evaporation load in the affected area. It considers how much material is wet and how much moisture is available to evaporate.
Class 1 – Low Evaporation Load
Class 1 generally involves a limited amount of water and a relatively small affected area.
Typical characteristics include:
- Small affected area
- Limited wet porous material
- Minimal carpet or padding involvement
- Low moisture absorption into structural materials
Because relatively little material is releasing moisture, the initial dehumidification requirement is usually lower.
Class 2 – Significant Evaporation Load
Class 2 involves more wet material and therefore a larger evaporation load.
Typical characteristics include:
- Larger affected area
- Wet carpet and padding
- Moisture entering walls or structural materials
- Moderate evaporation load
These projects commonly need greater moisture-removal capacity because more water is continuously moving from materials into the air.
Class 3 – High Evaporation Load
Class 3 projects involve extensive water exposure and a high potential evaporation load.
Typical characteristics include:
- Large quantities of water
- Wet walls, ceilings, insulation, and flooring
- Water entering from overhead or multiple surfaces
- High evaporation load
Humidity may rise quickly as drying begins, so stronger dehumidification and closer monitoring are generally required.
Class 4 – Specialty Drying
Class 4 commonly involves dense or low-permeability materials.
Examples include:
- Hardwood
- Concrete
- Plaster
- Brick
- Dense structural materials
These materials can hold substantial moisture but release it slowly. Specialized drying conditions may therefore be more important than simply installing additional standard dehumidifiers.
Calculate the Volume of the Affected Drying Area
Once the drying zone is established, calculate its total cubic volume.
Basic Formula
Cubic Feet = Floor Area × Ceiling Height
For example:
- Floor area: 1,000 ft²
- Ceiling height: 8 ft
The total volume is:
1,000 × 8 = 8,000 ft³
For several connected rooms, calculate each volume separately and add them together.
Example
| Area | Floor Area | Height | Volume |
| Living Room | 400 ft² | 8 ft | 3,200 ft³ |
| Bedroom | 250 ft² | 8 ft | 2,000 ft³ |
| Hallway | 150 ft² | 8 ft | 1,200 ft³ |
| Total | 800 ft² | — | 6,400 ft³ |
The drying calculation should therefore use approximately 6,400 ft³, rather than relying only on the 800 ft² floor area.
Containment also matters. If unaffected spaces are properly separated from the drying zone, they normally do not need to be included in the controlled volume.
Estimate the Required Daily Dehumidification Capacity
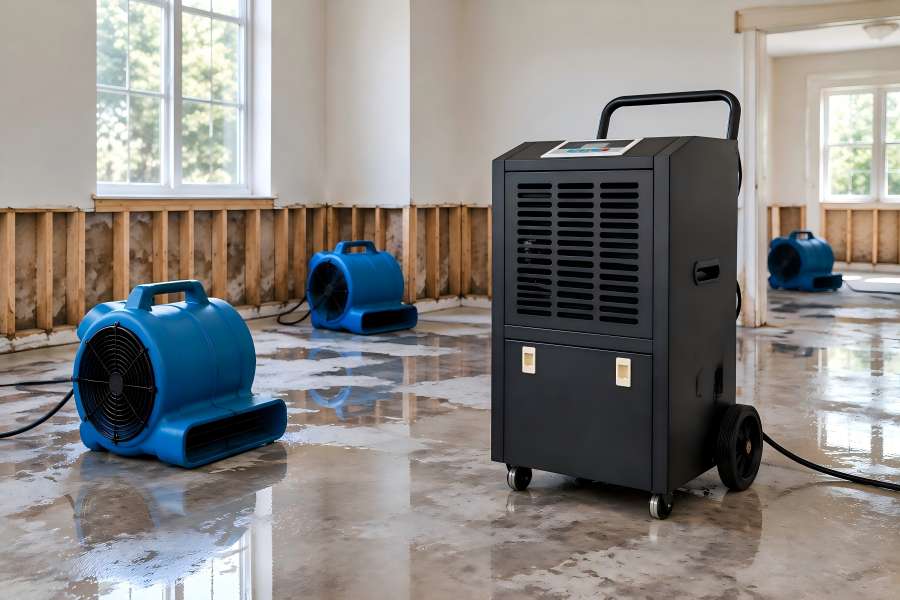
After calculating volume and assessing the water damage class, estimate the initial daily moisture-removal capacity needed for the project.
There is no single volume-per-pint formula that applies to every restoration site. Equipment guidance, project conditions, material readings, and the selected drying strategy should always take priority.
For illustration, a simplified planning method can use:
Required Dehumidification Capacity = Affected Volume ÷ Volume Factor
An example set of planning factors could be:
| Water Damage Class | Illustrative Volume Factor |
| Class 1 | 100 ft³ per pint/day |
| Class 2 | 50 ft³ per pint/day |
| Class 3 | 40 ft³ per pint/day |
These figures are illustrative estimating values, not fixed restoration requirements. A lower factor produces a higher estimated capacity because the assumed evaporation load is greater.
For example, an 8,000 ft³ Class 1 area using a factor of 100 gives:
8,000 ÷ 100 = 80 pints/day
The same 8,000 ft³ area treated as Class 3 using a factor of 40 gives:
8,000 ÷ 40 = 200 pints/day
This shows why room size alone cannot determine the required number of dehumidifiers.
Example: Calculate the Moisture-Removal Requirement
Consider a water damage project with:
- Floor area: 1,200 ft²
- Ceiling height: 8 ft
- Water damage class: Class 2
Step 1: Calculate the Room Volume
1,200 × 8 = 9,600 ft³
The affected drying volume is approximately 9,600 cubic feet.
Step 2: Apply the Selected Class Factor
For this example, assume a Class 2 planning factor of:
50 ft³ per pint/day
Then:
9,600 ÷ 50 = 192 pints/day
The estimated initial moisture-removal requirement is therefore approximately 192 pints per day.
This does not mean the machines will physically collect exactly 192 pints every day. It is an initial planning value that should later be checked against RH, temperature, material readings, condensate output, and drying progress.
Check the Dehumidifier’s Actual Rated Capacity
Once the required capacity is estimated, compare it with the performance of the available dehumidifiers.
Important specifications include:
- Rated moisture removal
- Test temperature
- Test RH
- Airflow
- Operating temperature range
- Low-temperature performance
- Energy consumption
- Defrost capability
Do not choose equipment only by cabinet size or the largest capacity number shown in marketing materials.
Rated Capacity Depends on Test Conditions
A dehumidifier generally removes more water under warm, humid conditions than in cooler, drier air.
A machine tested under high temperature and RH can therefore show a much larger pint-per-day value than the same unit under typical drying conditions.
AHAM-Type Ratings vs. Saturation Ratings
Restoration dehumidifiers may show several capacity values, such as:
- Standard-condition capacity
- AHAM-type capacity
- Saturation capacity
- Maximum laboratory capacity
Saturation capacity is normally measured under warmer and wetter conditions, so it can be substantially higher than a rating measured under more moderate indoor conditions.
For equipment calculations, compare ratings measured under similar conditions and use the value that most closely reflects the actual project environment.
Calculate the Number of Dehumidifiers Required
Once total required capacity and usable capacity per machine are known, the initial unit quantity can be calculated directly.
Basic Formula
Number of Dehumidifiers = Required Capacity ÷ Capacity per Dehumidifier
Using the previous example:
Required capacity:
192 pints/day
Assume each LGR dehumidifier provides:
80 pints/day
Then:
192 ÷ 80 = 2.4
Since partial units cannot be installed, round upward:
3 dehumidifiers
Why You Should Normally Round Up
Two 80-pint machines would provide:
2 × 80 = 160 pints/day
This is below the estimated requirement of 192 pints/day.
Three machines provide:
3 × 80 = 240 pints/day
This gives sufficient initial capacity while allowing some room for the difference between laboratory ratings and actual field performance.
Why Rated Capacity May Be Different from Actual Jobsite Performance
A dehumidifier rated at 80 pints/day will not necessarily collect 80 pints every 24 hours throughout a restoration project.
Actual drying conditions continuously change, while published capacity ratings are normally measured under controlled laboratory conditions.
Factors that can reduce moisture-removal performance include:
- Lower room temperature
- Lower RH later in the drying process
- Restricted airflow
- Dirty filters
- Coil contamination
- Poor equipment placement
- Long or restrictive ducting
- Frequent door opening
- Uncontrolled outdoor air infiltration
Conditions Change During Drying
At the beginning of a project, air and wet materials may contain substantial moisture, so condensate production can be high.
As the room RH falls and materials become drier, less water vapor is available. Daily condensate output therefore usually decreases as drying progresses.
Lower condensate production does not automatically indicate equipment failure.
Airflow Also Matters
A dehumidifier requires adequate airflow through its coils. Dirty filters, blocked intakes, contaminated coils, or restrictive ducting can reduce moisture-removal performance.
Filter condition, surrounding clearance, duct arrangement, and coil cleanliness should therefore be checked during longer drying projects.
Should You Add a Capacity Margin?
A small capacity margin can be useful when site conditions are uncertain or when actual performance may be lower than the nominal rating.
For example, if the calculated requirement is:
250 pints/day
Adding a 10% margin gives:
250 × 1.10 = 275 pints/day
If each available unit is rated at 90 pints/day:
275 ÷ 90 = 3.06
The practical selection becomes:
4 units
Without the margin:
250 ÷ 90 = 2.78
The calculation would indicate three units.
When a Margin May Be Useful
Additional capacity may be reasonable when:
- Outdoor air infiltration is difficult to control
- Door openings are frequent
- Hidden wet materials may still be present
- Indoor temperature is below ideal conditions
- Drying must proceed under demanding conditions
- Equipment performance is uncertain
A fixed 10% or 20% margin should not replace site monitoring. If temperature, RH, and material readings show satisfactory drying progress, additional units may provide little benefit.
How Temperature Affects Dehumidifier Quantity
Temperature has a major influence on refrigerant dehumidifier performance.
These machines cool humid air below its dew point so water condenses on the evaporator coil. As the surrounding air becomes colder, moisture removal can become less efficient.
At low temperatures:
- Coil icing risk increases
- Defrost cycles may become more frequent
- Moisture-removal capacity may decline
- Compressor runtime may increase
- Drying may take longer
A unit rated at 80 pints/day under normal test conditions may remove considerably less moisture in a cold building.
Low-Temperature Restoration
Cold projects may require:
- Low-temperature refrigerant dehumidifiers
- LGR dehumidifiers
- Desiccant dehumidifiers
- Supplemental heating where appropriate
Desiccant dehumidifiers use an adsorbent rotor rather than relying mainly on condensation. They can therefore be useful when temperatures are too low for efficient refrigerant operation.
Temperature Should Not Be Increased Blindly
Heating can increase moisture evaporation from wet materials, but it does not remove the resulting vapor.
If evaporation increases faster than dehumidification capacity, room humidity may rise. Heat, airflow, and moisture removal should therefore be balanced together.
When Should You Recalculate the Equipment Requirement?
The initial calculation is simply the first step. Conditions can change as materials dry, hidden moisture is discovered, or containment boundaries are adjusted.
Monitor:
- Room RH
- Temperature
- Material moisture content
- Grain or vapor-pressure conditions
- Dehumidifier condensate production
- Drying rate
- Airflow
- Newly discovered wet materials
Recalculate After New Moisture Is Found
Suppose the original drying zone contains 8,000 ft³, but inspection later finds another 3,000 ft³ of affected space.
The revised drying volume becomes:
8,000 + 3,000 = 11,000 ft³
The dehumidification requirement should then be recalculated.
Recalculate as the Project Dries
The opposite also happens. Once part of the structure reaches its drying target, equipment may be removed or relocated to remaining wet areas.
Adjusting equipment during the project can reduce unnecessary energy use while keeping capacity focused where it is still required.
Common Dehumidifier Sizing Mistakes
Even a reasonable formula can give poor results when the input information is incorrect.
Sizing Only by Square Footage
A 1,000 ft² room with an 8-ft ceiling contains:
8,000 ft³
The same room with a 16-ft ceiling contains:
16,000 ft³
Ignoring ceiling height can therefore significantly underestimate drying volume.
Misclassifying the Water Damage
Evaporation load depends heavily on the amount and type of wet material.
A small section of wet carpet does not create the same load as saturated drywall, insulation, subfloor, carpet, and framing throughout the room.
Comparing Different Capacity Ratings
An 80-pint unit and a 150-pint unit may not be directly comparable if their ratings were measured under different conditions.
Always check the test temperature and RH behind the published capacity.
Ignoring Temperature
Cold conditions can significantly reduce refrigerant dehumidifier performance.
Using nominal capacity without considering actual room temperature can lead to undersizing.
Forgetting Hidden Wet Materials
Moisture may remain inside:
- Wall cavities
- Insulation
- Subfloors
- Cabinets
- Ceiling assemblies
- Wood framing
- Concrete
If the calculation only considers visible wet surfaces, the total moisture load may be underestimated.
Using Too Few Dehumidifiers
An undersized system may struggle to reduce RH while wet materials continue releasing moisture.
This can extend drying time and increase total equipment operating hours.
Assuming More Equipment Always Means Faster Drying
Drying rate is also limited by the characteristics of the wet material.
Dense wood, concrete, plaster, and similar materials can release moisture slowly, so doubling dehumidification capacity will not necessarily reduce drying time by half.
Failing to Monitor Drying Progress
The initial equipment calculation cannot replace ongoing measurements.
Temperature, RH, material moisture, and equipment performance should be tracked so the drying plan can be adjusted when necessary.
Quick Dehumidifier Sizing Formula
A practical sizing process can be summarized in seven steps.
Step 1: Calculate the Affected Volume
Measure:
Length × Width × Height
Example:
30 ft × 25 ft × 9 ft = 6,750 ft³
Step 2: Determine the Water Damage Class
Assess how much of the structure is affected and how much moisture is available for evaporation.
Class 1, Class 2, Class 3, and Class 4 projects can require very different drying approaches.
Step 3: Estimate Required Moisture-Removal Capacity
Use the selected restoration sizing method, equipment guidance, and actual site conditions.
For an illustrative volume-based calculation:
Required Capacity = Affected Volume ÷ Selected Volume Factor
Step 4: Check the Dehumidifier Rating
Confirm:
- Rated pints/day
- Rating conditions
- Operating temperature
- Airflow
- Low-temperature capability
Use a capacity figure measured under conditions that reasonably match the project.
Step 5: Calculate Equipment Quantity
Use:
Required Capacity ÷ Capacity per Unit = Number of Dehumidifiers
For example:
220 pints/day ÷ 85 pints/day = 2.59 units
Step 6: Round Up
Since partial equipment cannot be installed:
2.59 → 3 dehumidifiers
If conditions are unusually demanding, determine whether a reasonable capacity margin is needed.
Step 7: Adjust According to Drying Progress
The final equipment quantity should not remain fixed simply because the initial calculation produced a certain number.
Continue checking:
- Temperature
- RH
- Material moisture
- Condensate output
- Airflow
- Drying rate
If materials are drying too slowly, first check airflow, hidden moisture, containment, temperature, and actual machine performance before simply adding more units.